Layers in Photoshop – Ultimate Guide for Beginners
Are Layers in Photoshop confusing you? Do you feel you are not using all the benefits Layers can bring in Photoshop? Well, you’re not alone as layers are arguably one of the most complex things in Photoshop but one of the fundamental aspects to take control of. So, in this tutorial, we bring you the most in-depth, ultimate guide to Layers in photoshop.
Here, we’ll show you everything layers have to offer such as creating and using multiple layers, adding layer styles, using smart objects as layers, layer masking, using adjustment layers and much more.
Plus, you can download the images I use and follow along with me. Download the images via the form below:
So, grab a tea or beer!, strap yourself in and get ready to learn all about Layers in Photoshop.
What are Layers in Photoshop?
Layers allow you to work on one part of an image without affecting the others. Think of layers as sheets of acetate (clear plastic) stacked one on top of the other. Where there is no image on a layer, you can see through to the layers below. In MS Word if you add an image, by default the text on the page will move to fit around the picture. If you tried a similar thing in Photoshop you could enlarge and move the image without affecting the text.

Illustration showing how layers work in Photoshop
Layers are displayed in the Layers Palette, which is usually at the bottom right of your Photoshop work area. You can also display the Layers palette by going to Window > Layers in the Menu bar.
Layers panel in Photoshop
Photoshop will automatically create a new layer when you drag and drop a picture onto your page or use the text tool. You can also add a new layer to work on by clicking on the Add New Layer icon located at the bottom of the Layers Palette (highlighted red). You can rearrange the Layer order e.g. to put one layer on top of another by selecting and dragging your layers up and down in the layer’s palette.
The image below has a grey background and 3 layers above it containing a mixture of text and images. Using Layers in Photoshop is a very versatile way of working as it allows you to change and adapt each layer independently from the rest.

An image as it appearson screen with an illustration of how it’s layered in Photoshop and how it looks in the layers panel.
Get access to ALL our online courses - 1000’s of videos, worksheets, critiques of members work, personalised support and much more with our monthly membership.
Layer Basics
You shouldn’t run before you can walk, especially in Photoshop! The first things to get to grips with when using layers in Photoshop is the following:
Moving
Resizing
Renaming
Layers as Smart Objects
Reorganising
Grouping
Hiding
Deleting
The best way to learn these basics is to watch this section in the video above. Here you’ll see how to achieve the above basics using the move tool, free transform tool and layers panel to rearrange, covert smart objects, hide and delete layers.
To learn from the basics to advance skills in Photoshop, click here.
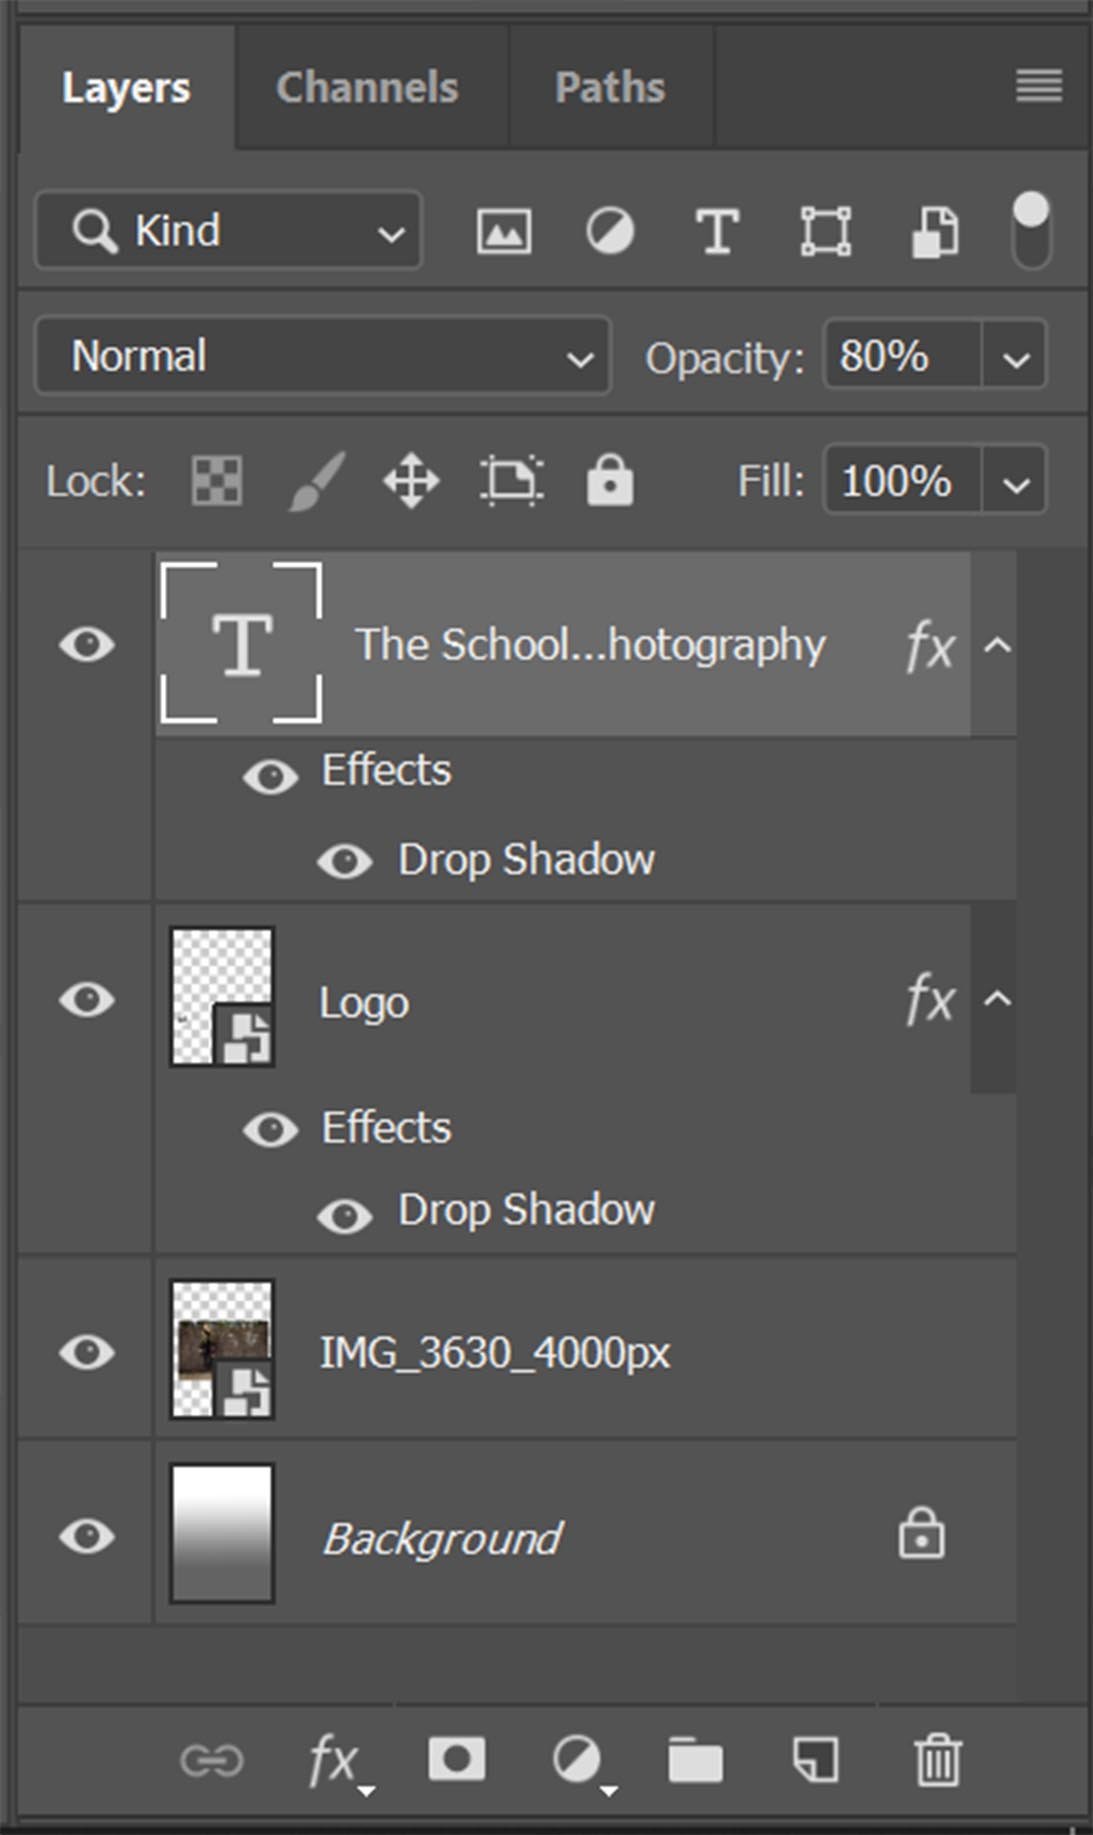
Layer Styles in Photoshop
Adding Layer Styles is a great way to add further design features to your layers. This works particularly well with the text. To add a layer style, double click on the blank part of the layer in the layers palette or right click on the layer and select ‘Blending Options’.
Layer styles can add effects such as ‘Bevel and Emboss’ or ‘Drop Shadows’. The effects you add are non-destructive meaning you can go back and change them whenever you like, as long as you save your image as a .psd (Photoshop file). The effects will appear under the layer and can be hidden independently by clicking the eye symbol next to the effect name. You can also hide the layer by clicking the eye symbol next to it.
Using Layer Styles in Photoshop
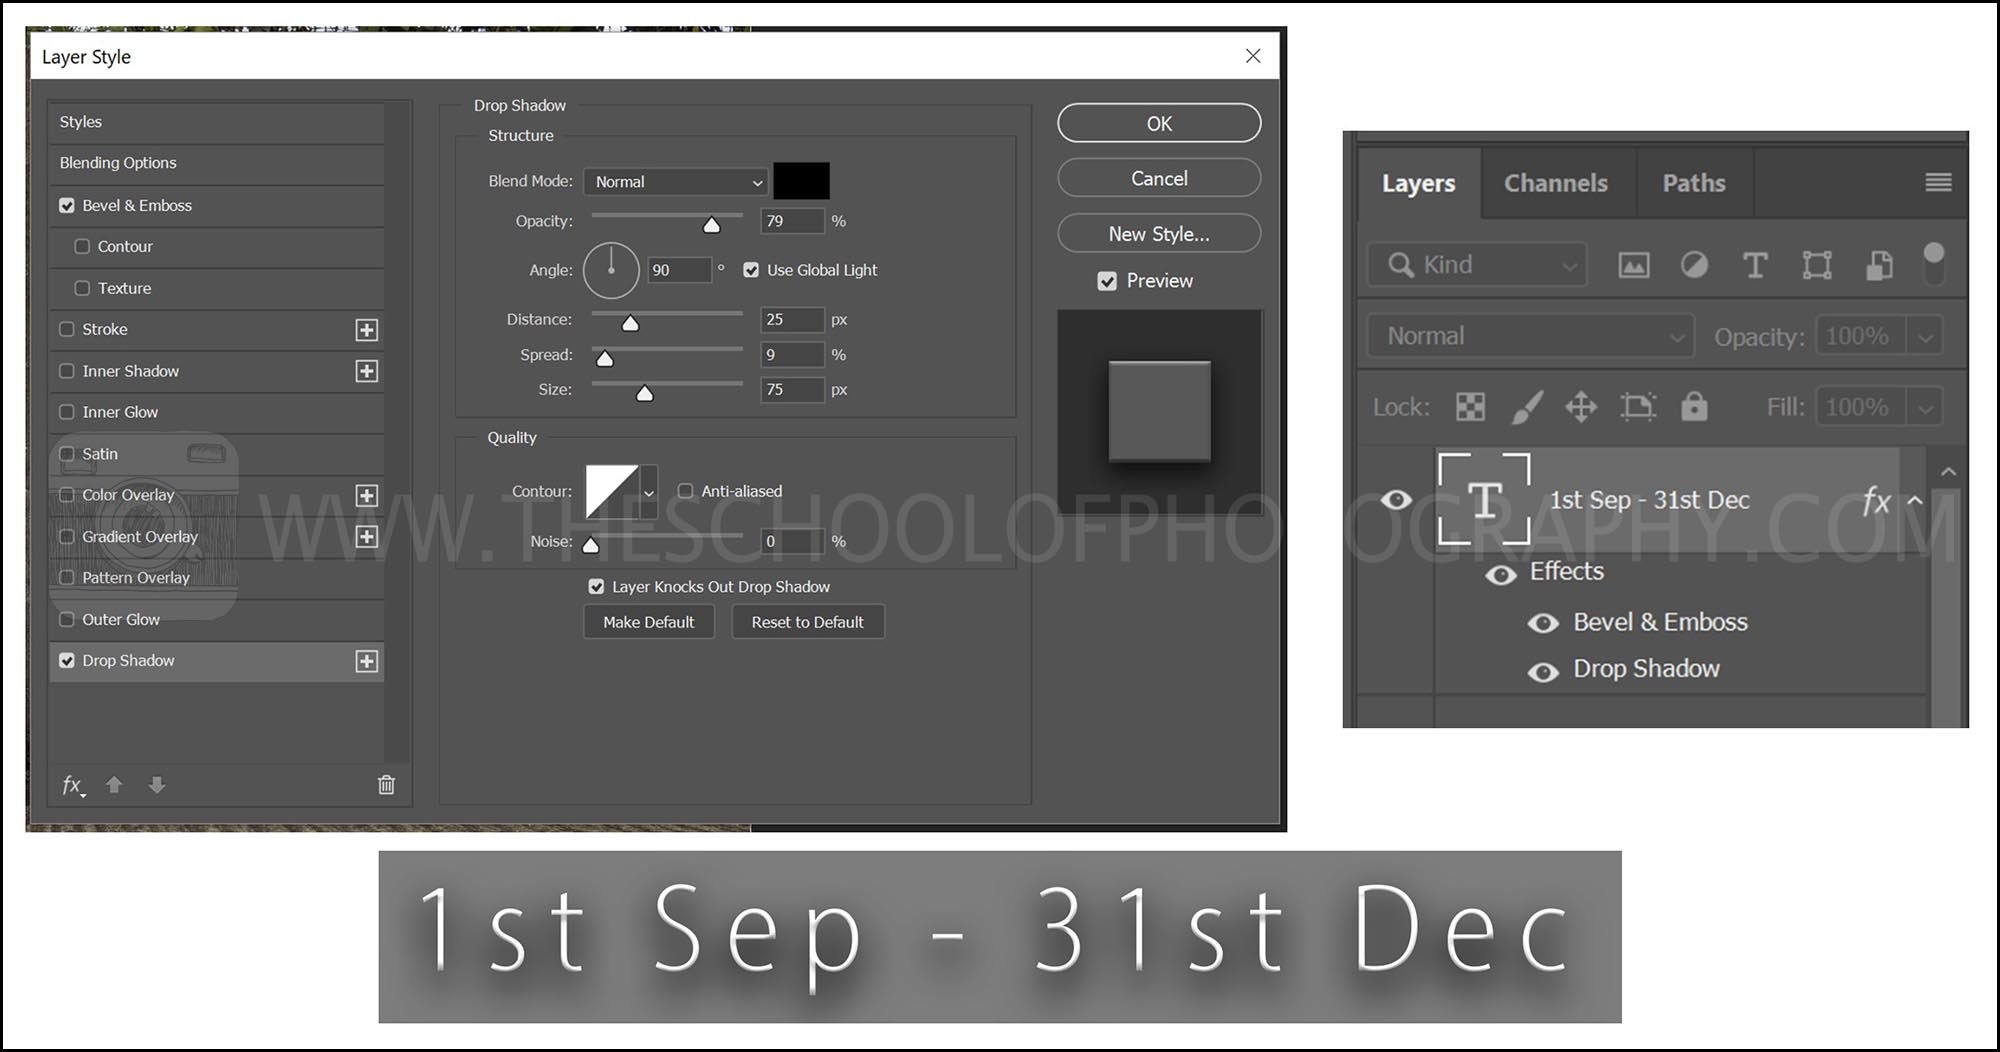
Layer Masks in Photoshop
With a layer mask, you can make the layer invisible by adding the colour black and make it visible again with the colour white. This makes the rubbing away of a layer a non-destructive move.
Example of layer masking in Photoshop
To add a Layer Mask, select the layer you want to add it to and click the Layer Mask Icon located at the bottom of the Layers Panel. To delete a Layer Mask, drag it into the bin at the bottom of the Layers Panel. To hide the effect of a Layer Mask, hold down the Shift Key and click on the mask.

How to add a layer mask in Photoshop
Using the Brush Tool on Layer Masks
There are many ways to add black or white to a mask, the most common being with the brush tool. The Brush tool is located in Photoshop’s toolbox. In the options bar, amongst other things, you can change the Size, Edge Hardness, Opacity, Flow and Smoothing of the Brush Tool.

Photoshop’s Brush Tool Options
Opacity – controls the transparency of the paint being applied. 100% Opacity = solid colour, 10% Opacity = very transparent colour.
Flow – controls the rate in which the paint flows out of the tool. 100% Flow = Full flow (solid colour), 10% Flow = only 10% of the paint will flow out of the tool.
Smoothing – This will smooth out any curved lines as you draw them.
For a detailed description of Flow and Opacity, click here.
Example of using layer masking in Photoshop. To see the image being made, please watch the video above.
Using Adjustment Layers in Photoshop
Adjustment Layers are separate layers that apply an effect on all of the layers below it. I.e. if you add a Black and White Adjustment Layer, it will turn all the layers below it black and white. You can also add an adjustment layer effect to just one layer by clipping it to the layer below.
Adjustment Layers come with a mask which works in the same way as any layer mask. Adding the colour black to the mask will hide the effect while adding white will reveal that effect.
Adjustment Layers in Photoshop are non-destructive which means they don’t apply the effect directly to the original image, they simply overlay it. They can be adapted or deleted without damaging the original source image at any time, as long as you save your image as .psd.
The easiest way to add an Adjustment Layer is to click the Adjustment Layer icon located at the bottom of the Layers Panel. There is also an Adjustments Panel which will give you the same options.
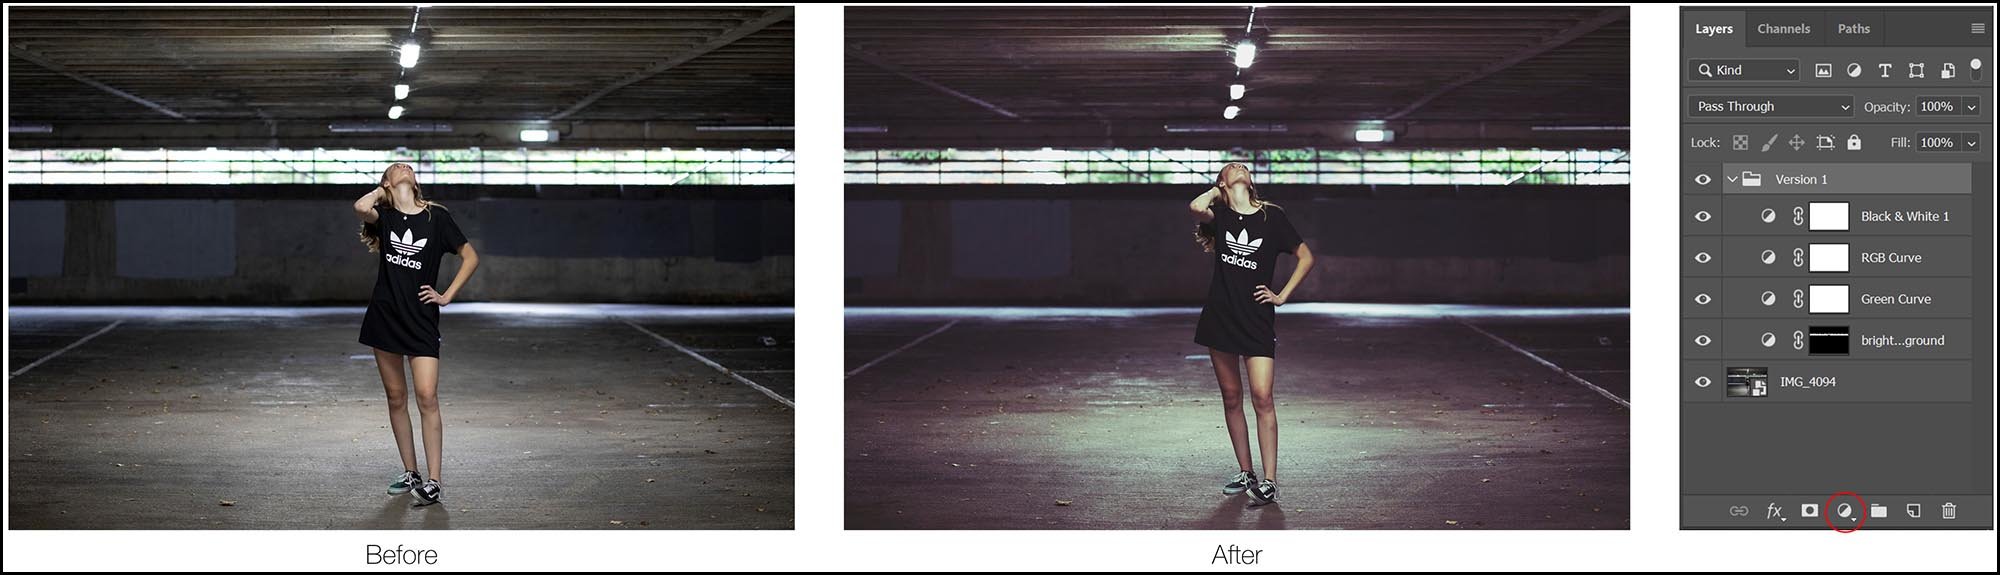
Example using adjustment layers in Photoshop. To see this image being created please watch the video above.
Curves Adjustment Layers
A popular adjustment layer in Photoshop is Curves. Curves allows you to boost shadows and lift highlights whilst getting a smooth transition in the midtones in-between. Thus, giving a very natural result. When using an RGB curve, pushing the curve line up will brighten the scene while pulling it down will darken it.
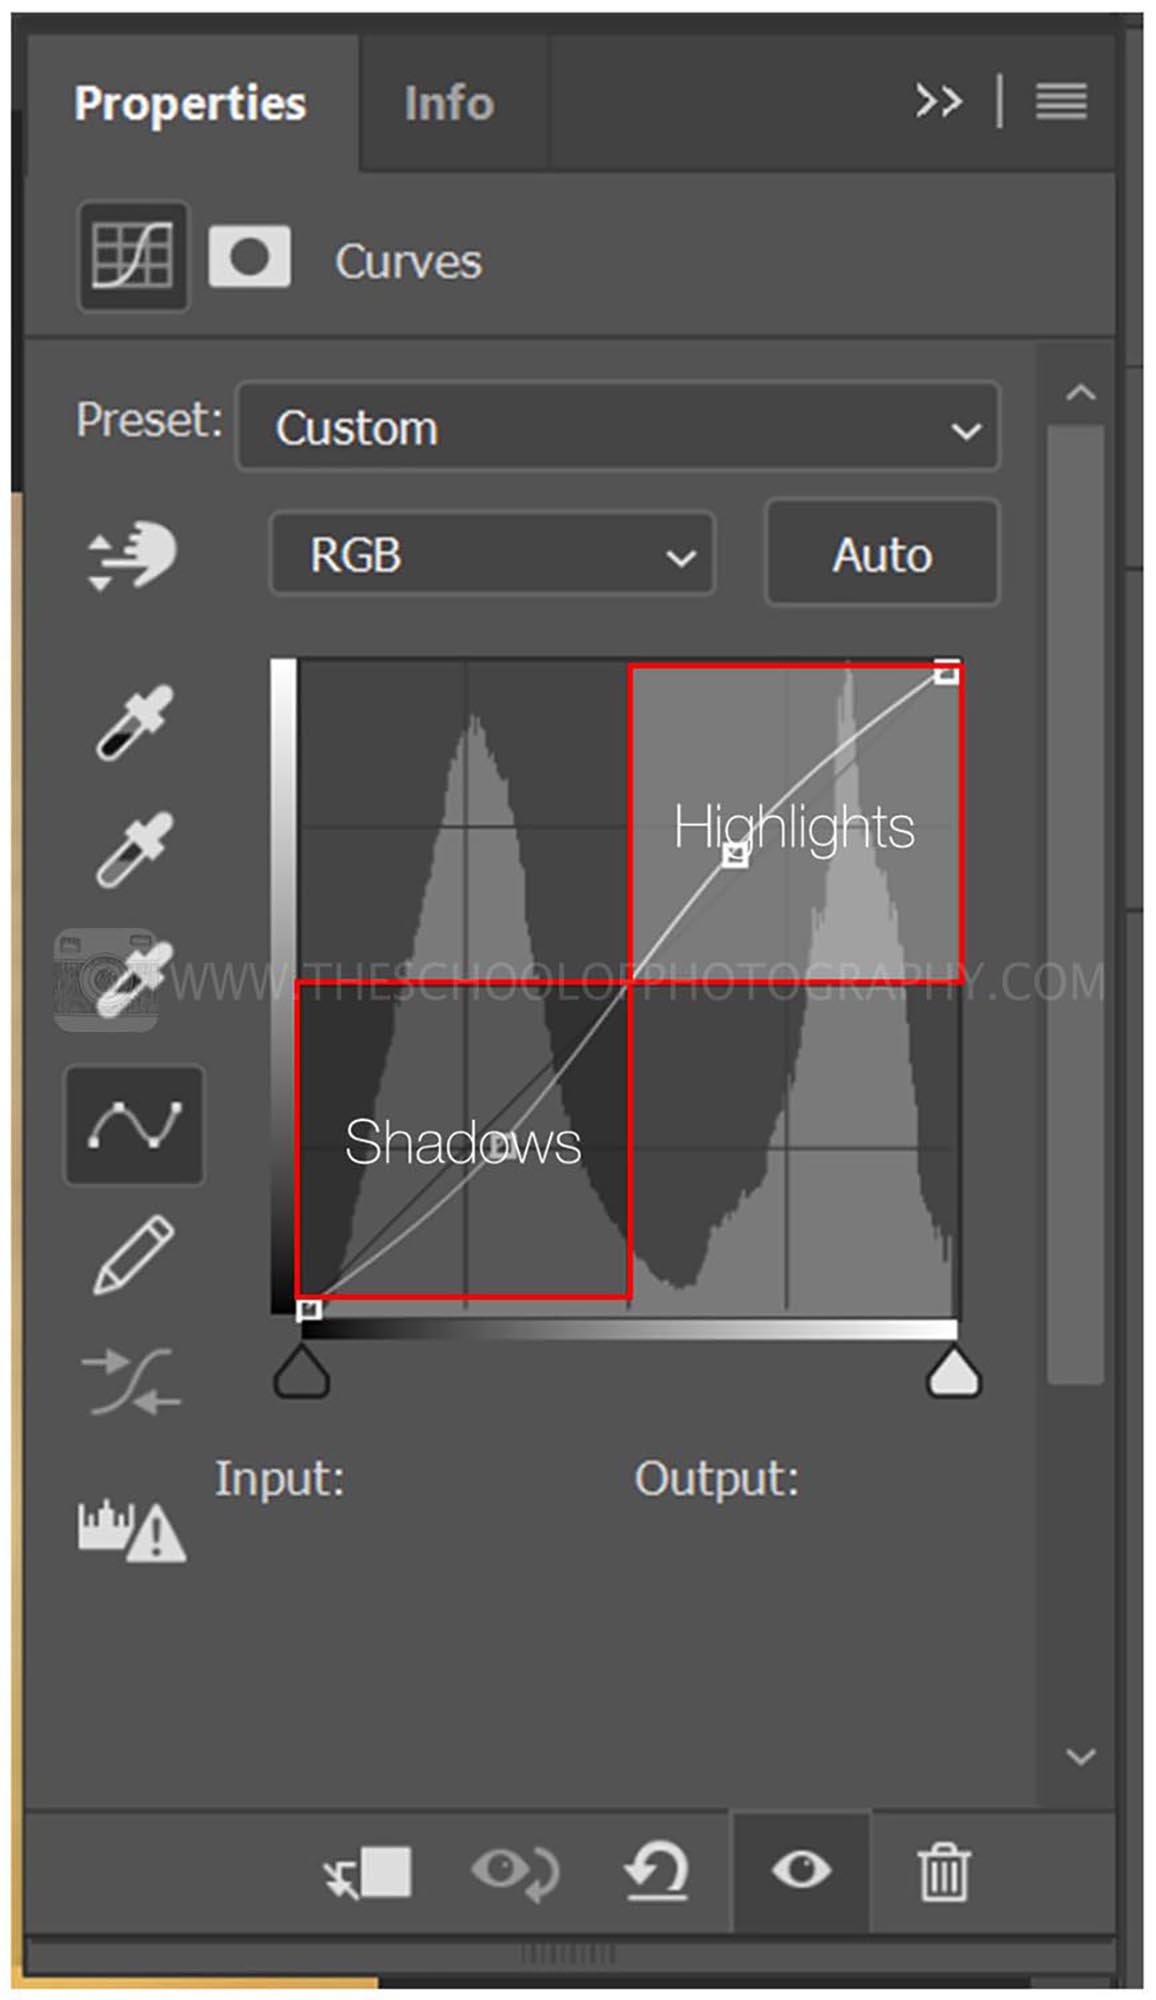
The Curves Adjustment Layer Properties in Photoshop
The top right of the curve box controls the highlights of the image and the bottom left controls the shadows. You can use curves across the whole colour range of the image (RGB), or you can target individual colour ranges. E.g. you could add yellows and reds into the scene to boost a sunset.
When using a Colour curve, moving the curve line up or down will add certain colours to the scene.
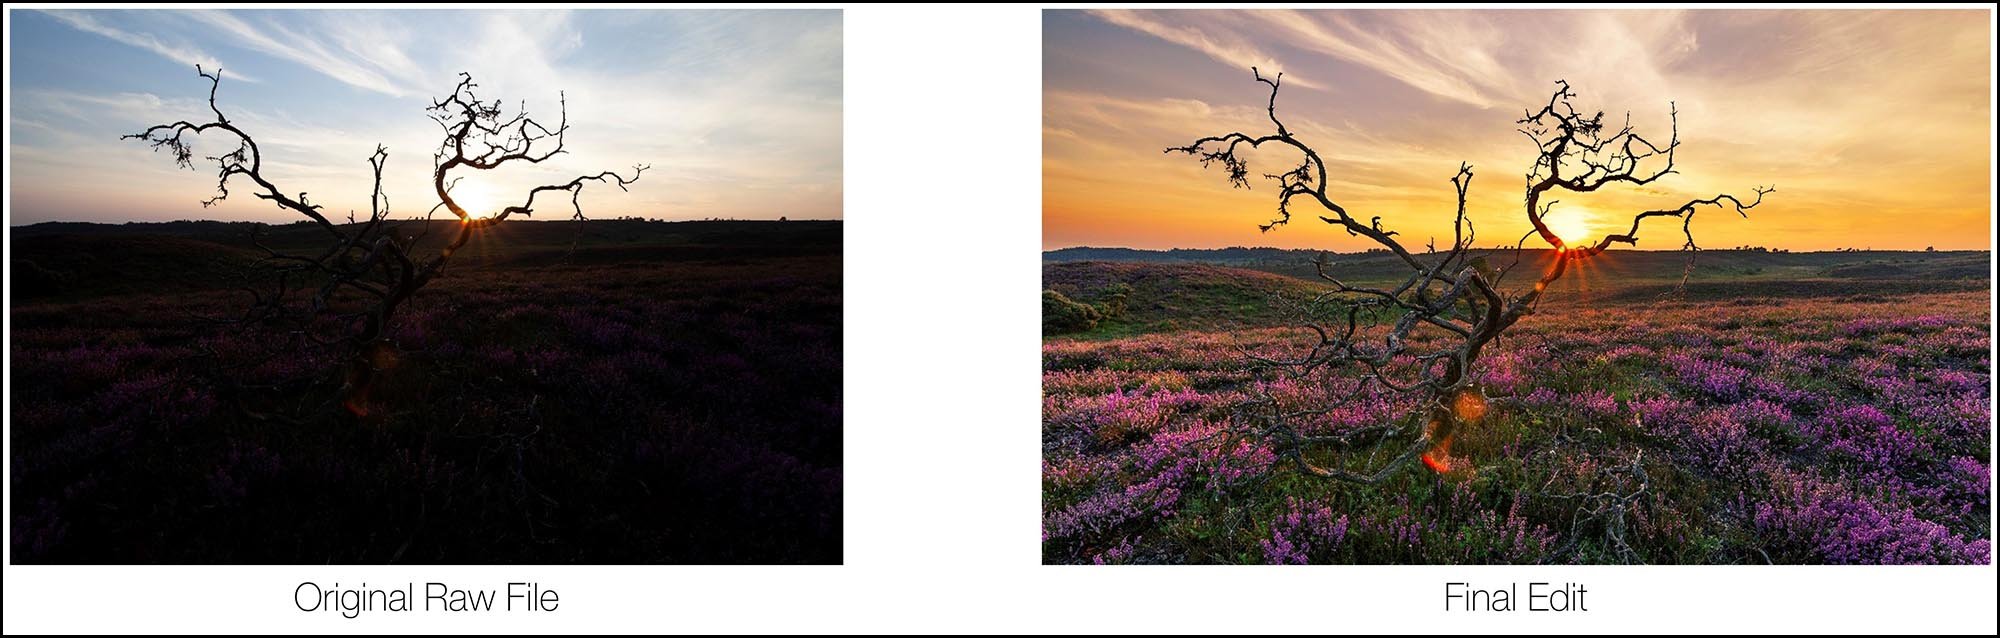
Example of using Curves Adjustment Layers in Photoshop
To learn how to use Adjustment Layers in Photoshop to enhance Landscape Photography, click here.
Like this? - Check out similar tutorials below
I hope you liked this tutorial, if you did please leave us a comment and support us by sharing it with your friends and subscribe to our newsletter at the bottom of this page for more.
We also have an excellent learning community on social media so please join us there as well.
Thanks for watching and remember – Learn more at The School of Photography.